 All photos except where noted: Fujifilm X Pro2, 23mm f/2 lens, and B+W 093 IR filter
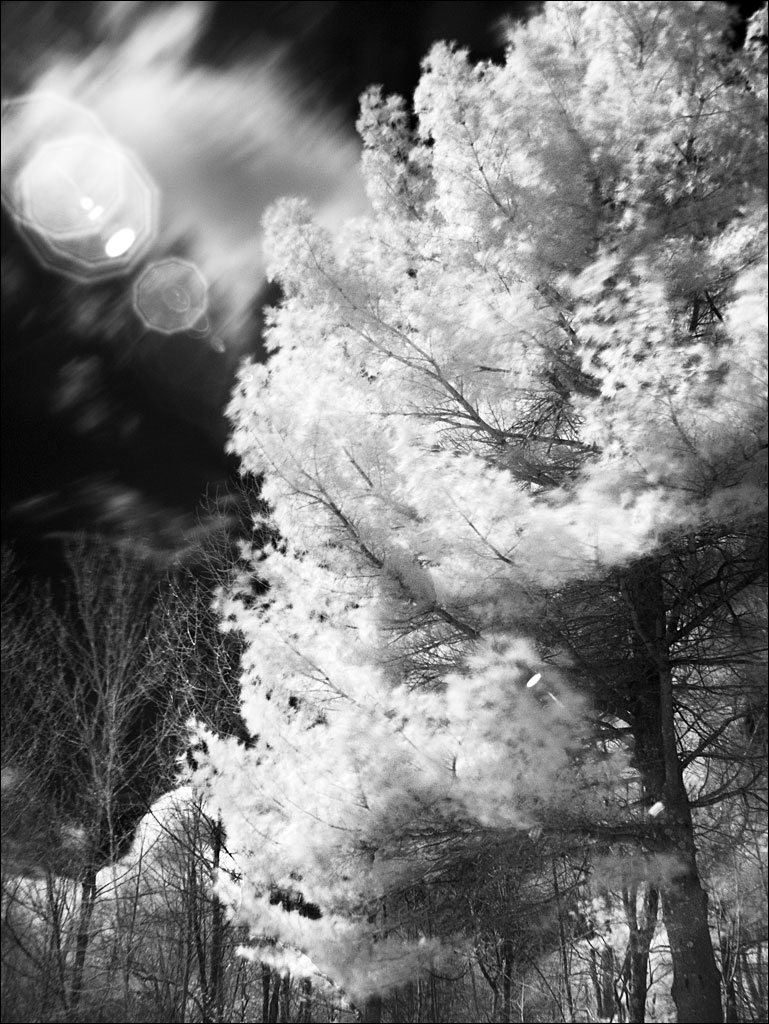
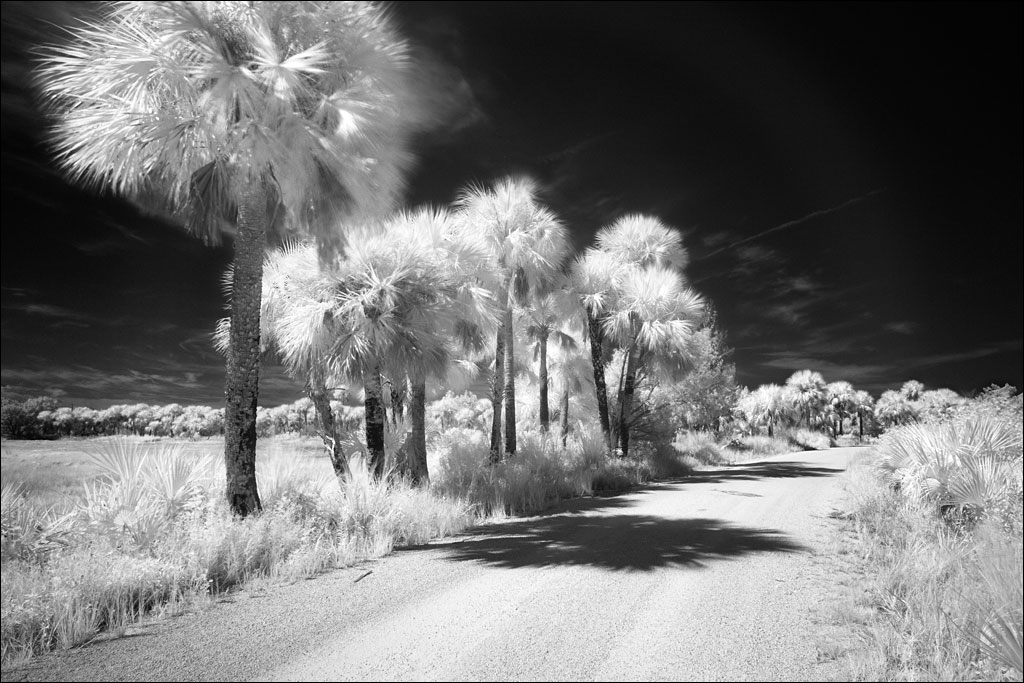
Some people will modify a camera specifically to shoot infrared (IR), but that can be a large commitment many people don’t want to make. However, an off-the-shelf digital camera with an IR filter can make images like these: Infrared Images. The IR filters will result in long exposures, so you will either need a tripod or use high ISO values to shorten the exposure time.
Infrared, or more accurately, near infrared or IR-A, is radiation with a wavelength from 700 to 1,400 nanometers, just beyond red in the visual spectrum. The classic look of IR images have brilliant white foliage, deep black skies and water, and an ethereal softness. This is not thermal imaging, which requires very specialized equipment to record the much longer wavelengths emitted by hot objects.
I have collected a few thoughts on shooting infrared images with a normal camera and IR filter for those interested in exploring this type of photography.
1. Choosing a Filter
IR filters are defined by their cut-on wavelength, the point at which the filter begins transmitting at least 50% of a specific wavelength. The most common IR filter is the R72 or Wratten 89b that has a cut-on wavelength of approximately 720 nanometers. I find filters that have a longer cut-on wavelength give a stronger IR effect. I use a filter with a cut-on wavelength of 850 nanometers such as a B+W 092 or Wratten 87c. The downside of a cut-on filter with a longer wavelength is the need for longer exposures. Most manufacturers have the technical specifications for their filters on their websites.
2. Setting your Camera’s White Balance
The camera will automatically produce very red images, making the image hard to judge. The first thing I do with my camera is set the camera’s custom white balance (WB) using foliage or grass. By setting WB with foliage, you will have a neutral image on your EVF or LCD, which makes it easier to judge compositions and exposures.
3. Controlling Exposure
You will find that your camera underexposes the images. Because IR images are very flat, giving more exposure than the camera calculates will give more information in the file for processing. It will also help reduce the effects of noise, which can result from either long exposures or high ISO values. I tend to overexpose my images by a couple of stops. I always shoot RAW files to maximize the bit depth of the information: JPEGs may show banding artifacts after processing because of less information in the 8-bit files.
4. Processing your Files
IR images will take a bit of time to understand how to process. Essentially, they are high-key images with much of the foliage in the highlights and skies and water in the shadows. If you are used to normal black and white images, you will find the highlights in IR images don’t have a lot of contrast and, if brought down too much, will look grey and muddy. I find using curves to push up the highlights and bring down the shadows gives that classic IR look. You will notice the image at the beginning of this post holds very little information in the mid tones, unlike the normal distribution of tones in visual spectrum monochrome images.
5. Dichromatic and Monochrome Images
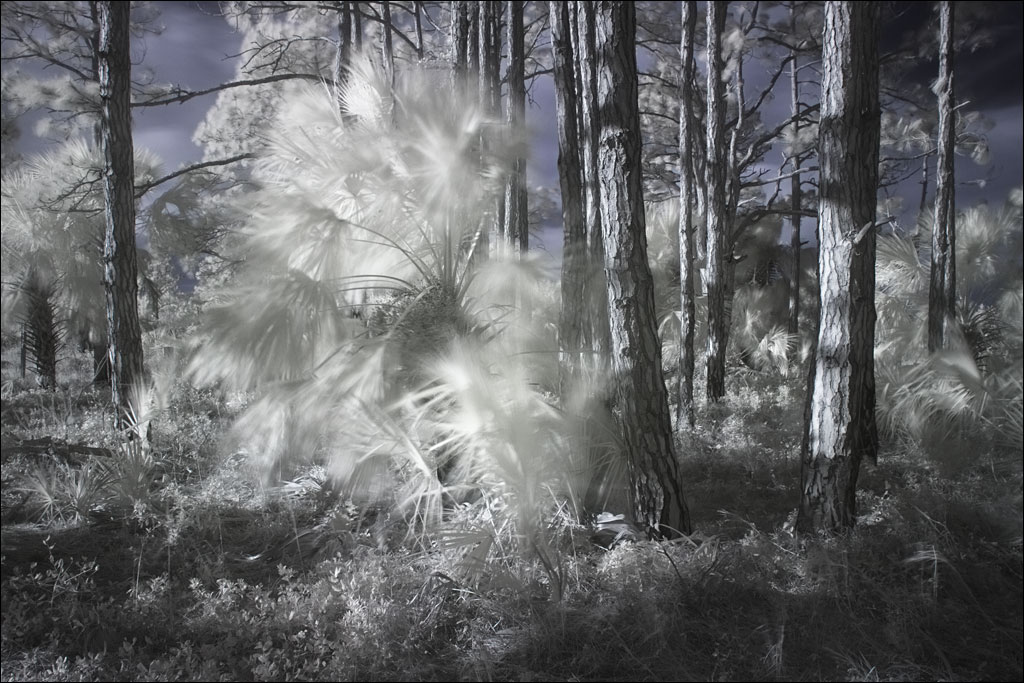
Most digital cameras will produce an image with two colors—the transmission of the RGB color filter array on the sensor creates this effect. By setting the WB on the foliage, areas of the image that do not have a strong IR response will have a red cast, leaving the foliage neutral. You can also use the WB dropper tool in your RAW processor to select which parts of the image are neutral in color. The hue slider in your image processing software will let you change the color however you wish, including into the blue in the example photograph above.
Naturally, the dichromatic image can be converted into a monochrome image easily. However, using a channel mixer before the conversion can give more control over the final look.
6. False Color Images
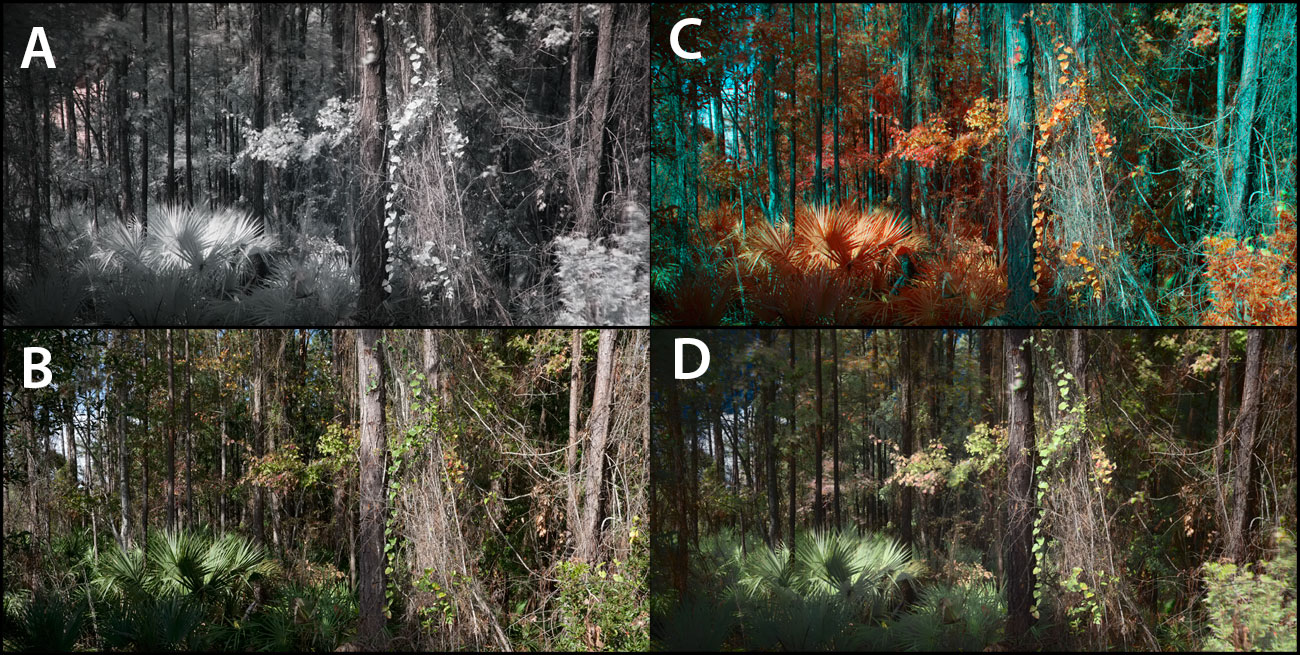
Taking a color reference image when you take the IR image will allow you to experiment with false color. The example below shows one image captured with an IR filter (A) and one without (B).
 Click on the image to make it larger.
In your image processing software, you can simply paste the black and white IR image (A) into the red channel of the natural color image (B). The false color image C will be the result from that operation. This is very similar to the look of color IR films of the past.
If you prefer to keep natural looking colors, green foliage and blues skies, convert the natural color image (B) into a Lab color space and paste the IR image (A) into the L channel, which will result in example image D. Unlike RGB, which encodes the image into three color channels, the Lab color space separates the luminance information, the L channel, from the color information, the a and b channels. This process simply maps the color to the luminance information in the IR image. Simply convert the Lab image back to RGB when you finish.
A Note on Lenses
Not all lenses will be suitable for IR photography. Naturally, lenses are optimized for the visual spectrum and the longer wavelength of IR radiation can result in unpredictable internal reflections and hotspots. A hotspot is a result of the material in a lens which causes a large, bright spot in the center of the image. The size of this spot changes with the aperture setting. There are resource on the internet that document the performance of lenses with IR.